> ## Documentation Index
> Fetch the complete documentation index at: https://nayax-44d6e37b-docs-marshall-faq-redistribution.mintlify.site/llms.txt
> Use this file to discover all available pages before exploring further.
# Pick Lists
export const EndpointCard = ({method = "API", title, children, href, arrow = true}) => {
const METHOD_STYLES = {
GET: {
bg: "mint-bg-green-400/20 dark:mint-bg-green-400/20",
text: "mint-text-green-700 dark:mint-text-green-400",
border: "mint-border-green-300 dark:mint-border-green-700"
},
POST: {
bg: "mint-bg-blue-400/20 dark:mint-bg-blue-400/20",
text: "mint-text-blue-700 dark:mint-text-blue-400"
},
PUT: {
bg: "mint-bg-yellow-400/20 dark:mint-bg-yellow-400/20",
text: "mint-text-yellow-700 dark:mint-text-yellow-400"
},
PATCH: {
bg: "mint-bg-orange-400/20 dark:mint-bg-orange-400/20",
text: "mint-text-orange-700 dark:mint-text-orange-400"
},
DELETE: {
bg: "mint-bg-red-400/20 dark:mint-bg-red-400/20",
text: "mint-text-red-700 dark:mint-text-red-400"
},
API: {
bg: "mint-bg-black",
text: "mint-text-white"
}
};
const MethodBadge = ({method}) => {
const style = METHOD_STYLES[method?.toUpperCase()] ?? METHOD_STYLES.GET;
return
{method?.toUpperCase()}
;
};
const content =
{}
{title}
{children &&
{children}
}
{}
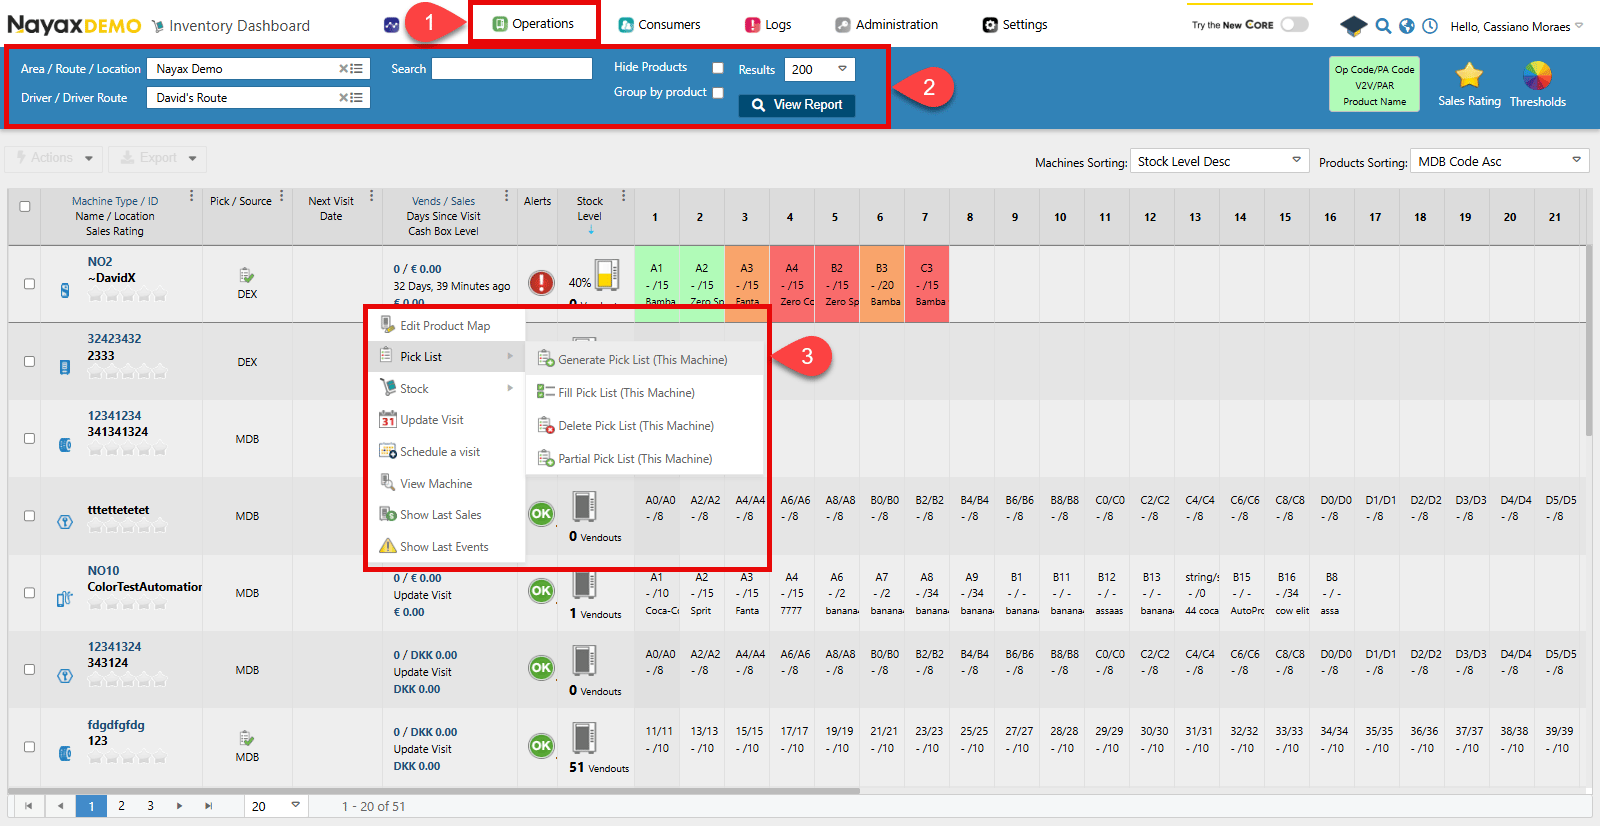 ### Generate for multiple machines
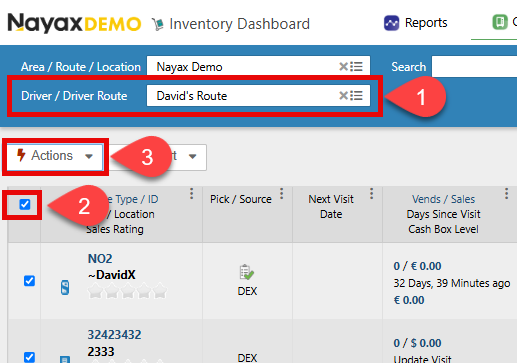
To generate a pick list for more than one machine at once, for example all machines under a specific Route:
1. Add the filter to the search feature.
2. Select all the machines in the list (you can also individually select the machines you want).
3. Click **Actions > Generate Pick List**.
### Generate for multiple machines
To generate a pick list for more than one machine at once, for example all machines under a specific Route:
1. Add the filter to the search feature.
2. Select all the machines in the list (you can also individually select the machines you want).
3. Click **Actions > Generate Pick List**.
 ## Generate a pick list via API
Use the [Create Pick List](/reference/lynx/machine-inventory/create-pick-list) endpoint to generate a pick list for a specific machine based on its current stock levels and sales data.
**Authentication**
Refer to the [Security & Token](/docs/manage-data-operations/lynx-api/security) page of this documentation to learn how to access your tokens and how to properly use them to authenticate your API requests.
## Generate a pick list via API
Use the [Create Pick List](/reference/lynx/machine-inventory/create-pick-list) endpoint to generate a pick list for a specific machine based on its current stock levels and sales data.
**Authentication**
Refer to the [Security & Token](/docs/manage-data-operations/lynx-api/security) page of this documentation to learn how to access your tokens and how to properly use them to authenticate your API requests.
Send a POST request with the `MachineID` as a path parameter. The endpoint returns `204 No Content` on success — no response body is returned.
```sh Request theme={null}
curl -X POST "https://qa-lynx.nayax.com/operational/v1/machines//pickLists" \
-H "Authorization: Bearer " \
-H "Content-Type: application/json"
```
The endpoint also accepts optional query parameters to refine the pick list — see the [Create Pick List](/reference/lynx/machine-inventory/create-pick-list) reference page for details.
After generating a pick list, see [Pick List Actions](/docs/manage-data-operations/lynx-api/inventory-management/pick-list-actions) to retrieve, update, or delete it.